Adding a purchase button or embedded widget
Use [showpass_widget] to sell tickets, products, or memberships from a WordPress page. By default, it creates a button that opens the purchase widget in a modal, an overlay on the current page. Set embedded="true" to display the widget inline, within the page layout.
Add your first button
- Open the page or post in the WordPress editor.
- Add a Shortcode block.
- Paste the shortcode below, replacing the event slug.
- Select Update or Publish, then check the button on the published page.
[showpass_widget slug="summer-concert"]
The slug is the last part of the event URL. For https://www.showpass.com/summer-concert/, use summer-concert.
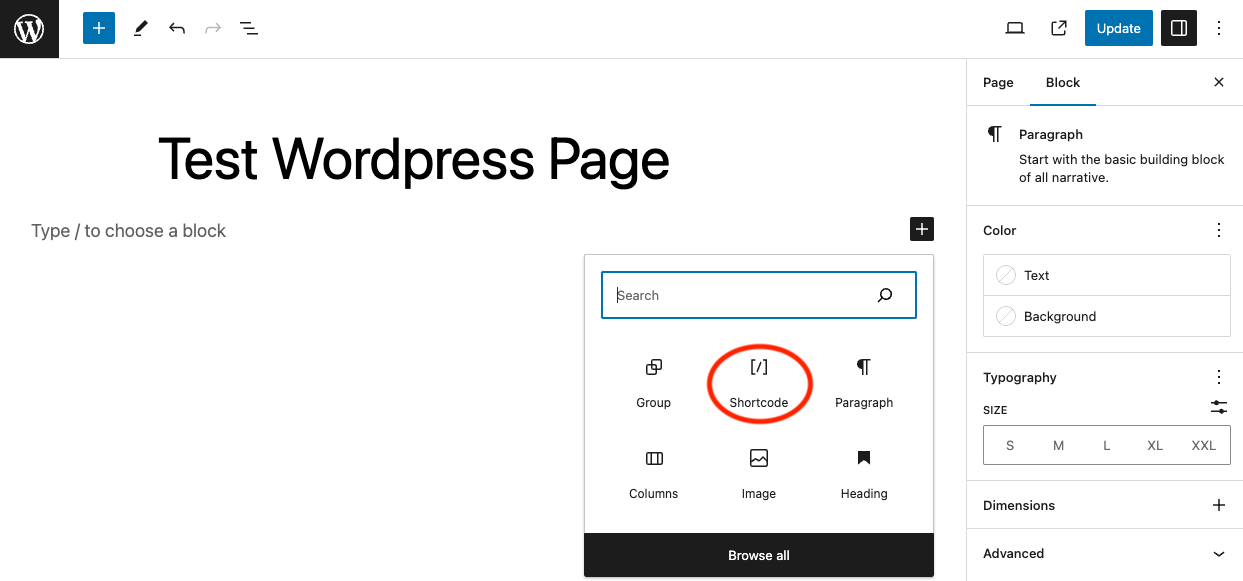
The default button label is Get Tickets. Use label to change it:
[showpass_widget slug="summer-concert" label="Buy Tickets"]
Choose what to sell
| Offering | Shortcode | Identifier |
|---|---|---|
| Event tickets | [showpass_widget slug="summer-concert"] |
Event slug; type="event" is the default |
| Products | [showpass_widget type="product" id="12345" label="Shop Now"] |
Product ID |
| Memberships | [showpass_widget type="membership" id="67890" label="Join Now"] |
Membership group ID |
Use the identifier for the offering you want to sell. A product or membership ID is not an event slug.
Embed one widget
To display the purchase interface directly on a dedicated page, add embedded="true":
[showpass_widget slug="summer-concert" embedded="true"]
The same setting applies to product and membership widgets:
[showpass_widget type="product" id="12345" embedded="true"]
Choose the example for your page; these are alternatives, not a layout containing several inline widgets.
Customize the widget
Add parameters inside the shortcode, separated by spaces. Use straight quotation marks.
| Parameter | Purpose | Example or default |
|---|---|---|
type |
Select tickets, products, or memberships | "event" (default), "product", or "membership" |
slug |
Choose an event | slug="summer-concert" |
id |
Choose a product or membership group | id="12345" |
label |
Set the button text | label="Register Now" |
embedded |
Display inline instead of opening a modal | embedded="true"; default is false |
tracking_id |
Apply a Showpass tracking token | tracking_id="campaign-token" |
show_specific_tickets |
Limit the ticket types shown | show_specific_tickets="123,456" |
class |
Apply your theme's button classes | class="btn btn-primary" |
keep_shopping |
Select “Keep Shopping” (true) or “Close” (false) for this purchase widget |
Inherits the plugin's global setting when omitted |
show_widget_description |
Override description visibility | "true" or "false"; inherits the global setting when omitted |
For example, a workshop button with selected ticket types:
[showpass_widget slug="winter-workshop" label="Book a Workshop" show_specific_tickets="123,456" keep_shopping="true"]
keep_shopping changes the purchase widget's button label. It is not a basket-linking setting. Do not assume the same parameter changes the calendar widget's controls.
For tracking setup, see Widgets and affiliate tracking links.
Button styling
The default button class is showpass-button, unless a default class is configured in the plugin settings. Supplying a custom class replaces that choice and omits the default ticket icon.
To style the existing button, add CSS through Appearance → Customize → Additional CSS or your child theme:
.showpass-widget-button {
    background-color: #9e2a2b;
    color: white;
    padding: 15px 30px;
    border-radius: 8px;
}

.showpass-widget-button:hover {
    background-color: #7d2122;
}
Offer several events with one basket
Use separate buttons that open modals for offerings from the same Showpass organization. You can combine single-event buttons with calendar buttons:
[showpass_widget slug="general-admission" label="Book Admission" keep_shopping="true"]
[showpass_widget slug="winter-workshop" label="Book a Workshop" keep_shopping="true"]
[showpass_calendar_widget label="Browse Experiences" tags="experiences"]
[showpass_cart_button]
Customers can add an item, close the modal, open another offering, and return to the cart to check out. Keep the cart button easy to find, including when customers navigate between booking pages.
Limitations and launch checks
Do not use multiple inline SDK widgets on the same page unless using Showpass Website Builder. This includes several purchase widgets or a mixture of embedded purchase and calendar widgets. Do not rely on separate inline widgets to maintain one synchronized basket.
For several offerings with one basket, use modal buttons throughout. A single inline widget is a different layout; do not assume that mixing inline widgets and modals has the same basket behavior. See Multiple widgets and a shared basket.
Before launch, test the customer's complete journey on desktop and mobile: add admission, add a workshop or experience, reopen the cart, and confirm both items are present. Repeat in the opposite order and across any relevant pages, using the same website and browser before the basket expires.
Troubleshooting
| Problem | What to check |
|---|---|
| No button appears | Confirm the plugin is active, check the shortcode and quotation marks, then clear site caches. |
| The wrong offering opens | Check type and the event slug, product ID, or membership group ID. |
| Connection is blocked | Confirm HTTPS, domain configuration, and the browser console error. |
| An embedded widget looks cramped | Check its container width and theme CSS. |
For more layouts, see event lists, event detail pages, and custom templates.